>>
30-MINUTE MEALS! Get the email series now →


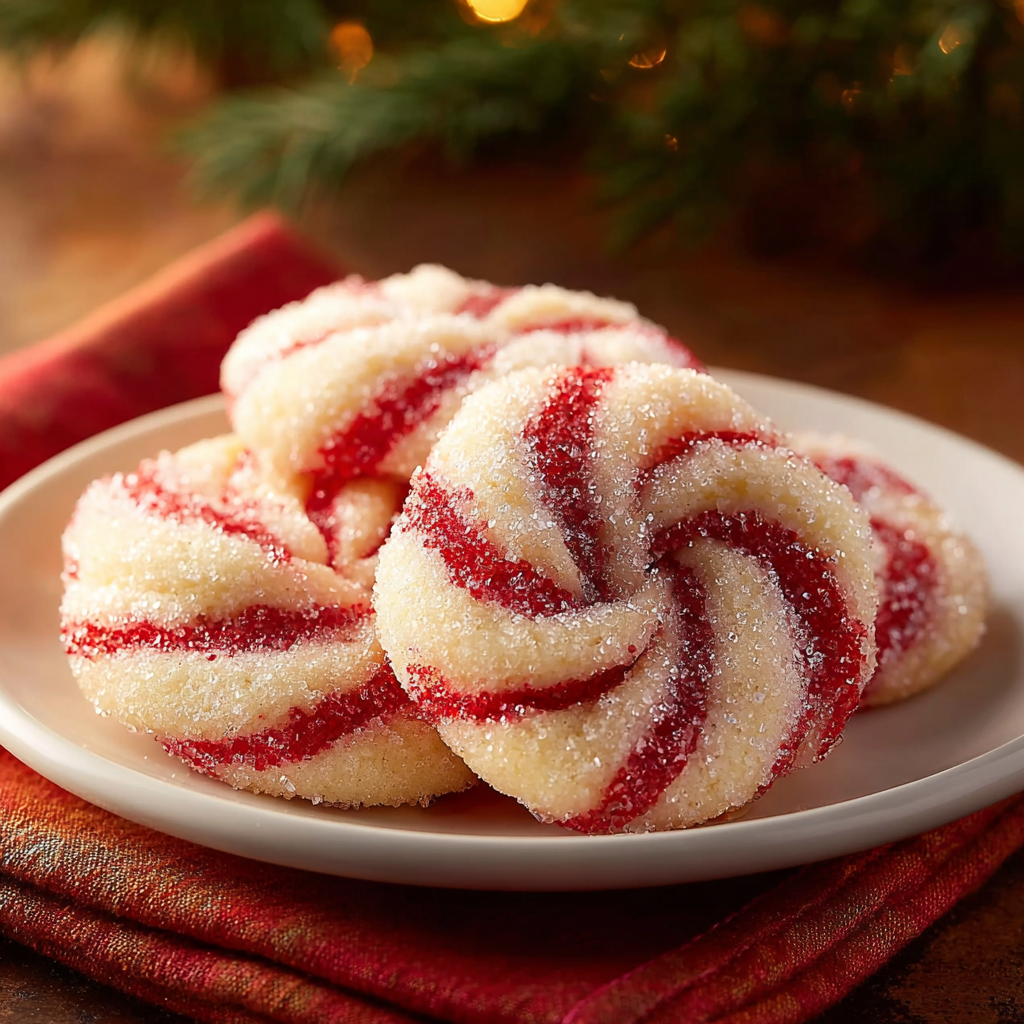
Buttery, tender cookies with a festive red-and-white swirl and a sparkling peppermint coating—perfect for holiday baking, gift tins, and cozy afternoons.

This peppermint swirl cookie started as a last-minute idea during a December cookie swap and immediately became our household classic. I remember the first time I tried the red-and-white twist: the kitchen filled with a cool peppermint perfume, the butter gave a melt-in-your-mouth richness, and the slight crunch from the coarse sugar or crushed peppermint on the outside created a textural contrast that made everyone reach for seconds. I discovered this combination the year my neighbor handed me a jar of crushed peppermint candies and challenged me to turn them into something festive; the result was so universally loved that I began baking a double batch every holiday.
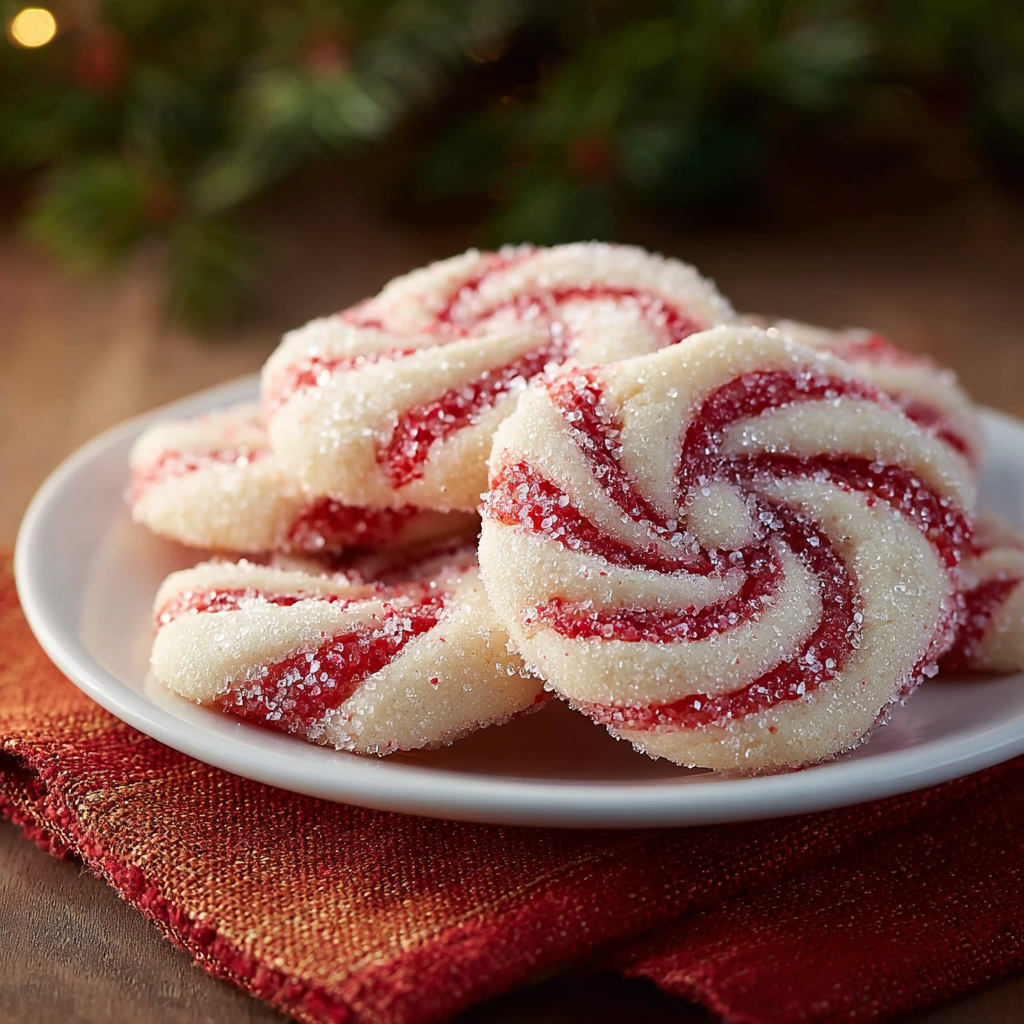
What makes these cookies special is the balance of flavors and textures. The dough is tender rather than cakey, thanks to softened butter creamed with sugar, and the peppermint extract is used judiciously so the cooling note brightens rather than overwhelms. The visual appeal—a neat red swirl against pale dough—also makes these cookies irresistible gifts. These are the sort of cookies people remember: simple ingredients, forgiving technique, and joyful presentation that feels homemade but thoughtful.
In my own kitchen these have become a holiday ritual. My kids love mixing the red dough and pressing the coils together, and neighbors always ask for 'the peppermint ones' when tins go out the door. Over time I've learned to keep the peppermint extract measured so the cooling note remains a highlight rather than the headline.
What I love most about this method is how forgiving it is. Even if your first slices are imperfect, the cookies still bake beautifully and look charming piled on a plate. Over the years neighbors have told me they bought these at small bakeries because they look so professional—yet they were made in my kitchen with simple tools and a bit of patience.
Store the cooled cookies in an airtight container layered with parchment or wax paper to prevent sticking. Keep at room temperature out of direct sunlight for up to 5 days. For longer storage, freeze fully cooled cookies in a single layer on a baking sheet, then transfer to a zip-top freezer bag or freezer-safe container for up to 3 months. Thaw at room temperature for 30 minutes before serving; if you prefer a slightly crisp exterior, refresh in a 300°F oven for 5 minutes.
For a dairy-free version, substitute dairy-free sticks of butter 1:1 and use a vegan egg replacer like a flax 'egg' (1 tbsp ground flax + 3 tbsp water) though texture will be a touch denser. If you want stronger peppermint without extract, fold 2 tablespoons of finely crushed peppermint candies into the red dough. To reduce sugar on the outside, choose a light dusting of granulated sugar instead of crushed candy; note that candy adds noticeable flavor as well as crunch.
These are lovely with hot chocolate, espresso, or a cold glass of milk. Arrange on a festive platter with sprigs of rosemary or evergreen for holiday service, or stack in clear cellophane bags tied with ribbon for neighbor gifts. Pair alongside shortbread or ginger snaps to create a diverse cookie tin where textures and flavors complement each other.
Swirled cookies play into a long tradition of European rolled pastries and pinwheel cookies, adapted in North American home baking for holiday gatherings. The peppermint flavor evokes classic winter confections like candy canes, which became widely popular in America in the 19th century. This combination of vanilla, butter, and peppermint is a modern interpretation that balances nostalgic flavors with simple assembly techniques.
In winter use red gel for the classic look; in other seasons swap the red for pastels or leave the dough uncolored and add citrus zest to the white portion for a lemon-mint twist. For Halloween, use orange gel with a hint of cinnamon in the white dough to create a warming autumn profile. Flavor-wise, reducing peppermint in spring and adding finely grated lemon zest brightens the cookies for warmer months.
Make dough up to 3 days in advance and keep logs wrapped in the fridge. For busy holiday schedules, freeze the logs solid, then slice and bake directly from frozen—add 1 to 2 minutes to baking time. To portion for events, slice and store cookies in stacks of 12 per container so you can grab-and-go without rummaging through larger tins.
These peppermint swirl cookies are a small ritual that yields big joy—perfect for sharing, gifting, and making memories. Whether you bake a single sheet for an afternoon treat or a dozen for holiday trays, the process is simple, the look is festive, and the results always invite smiles.
Use room-temperature butter and egg to ensure even creaming and smooth dough without overworking.
Chill the assembled log thoroughly; slightly firm dough slices neater cookies with defined swirls.
If peppermint extract is strong, start with 3/4 teaspoon and adjust; you can always add crushed candy after baking for more peppermint flavor.
Slice with a sharp knife and wipe clean between cuts to keep edges tidy.
This nourishing peppermint swirl cookies recipe is sure to be a staple in your kitchen. Enjoy every moist, high protein slice — it is perfect for breakfast or as a wholesome snack any time.
Yes. Chill the log for at least 30 minutes so slices hold shape; if dough is too soft chill longer. Baking from chilled ensures minimal spread.
Store in an airtight container at room temperature for up to 5 days or freeze for up to 3 months in a freezer-safe bag.
This Peppermint Swirl Cookies recipe makes perfectly juicy, tender, and flavorful steak every time! Serve with potatoes and a side salad for an unforgettable dinner in under 30 minutes.
Preheat oven to 350°F and line baking sheets with parchment or silicone mats. Arrange racks in the center and upper third if baking two sheets.
Whisk flour, baking powder, and salt together to ensure even leavening distribution and prevent lumps.
Beat softened butter and granulated sugar until pale and fluffy, about 2 to 3 minutes. This traps air for tender texture.
Mix in the egg, vanilla, and peppermint extract until incorporated, tasting cautiously for peppermint intensity.
Add dry ingredients in two additions on low speed until just combined. Divide dough into halves for coloring and shaping.
Tint one half with red gel and roll both halves into 2-inch logs. Press together, roll to form a soft spiral, wrap, and chill 30 minutes.
Slice chilled log into 1/4–1/3-inch rounds, roll edges in coarse sugar or crushed candy, and bake 10–12 minutes until edges are set.
Cool on the sheet for 5 minutes then transfer to a wire rack. Store airtight at room temperature up to 5 days or freeze up to 3 months.
Last Step: Please leave a rating and comment letting us know how you liked this recipe! This helps our business to thrive and continue providing free, high-quality recipes for you.
Leave a comment & rating below or tag
@magicmealideas on social media!
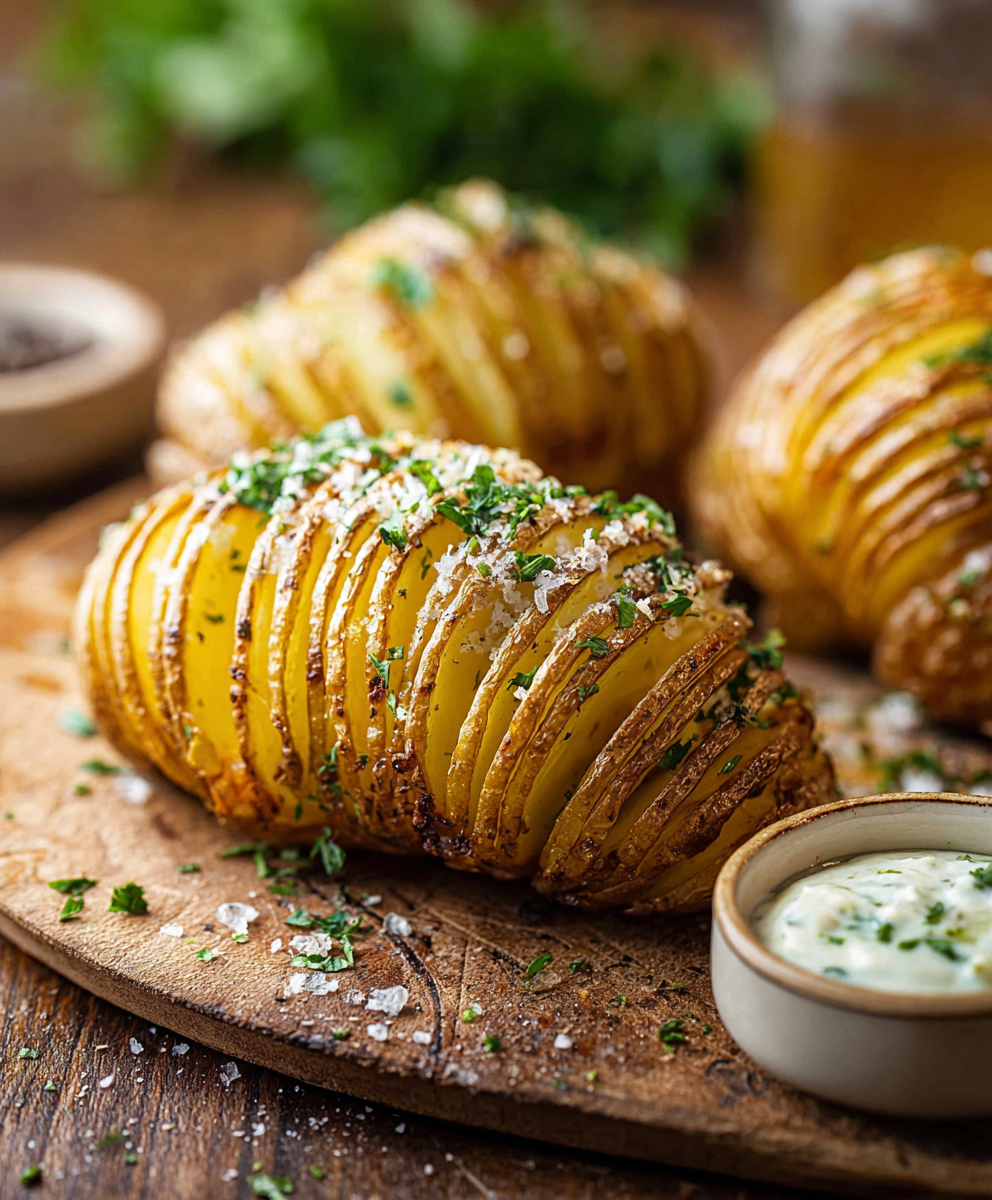
Thinly sliced, butter-brushed russet potatoes baked until the edges crisp and the insides stay tender — a simple side that feels special.
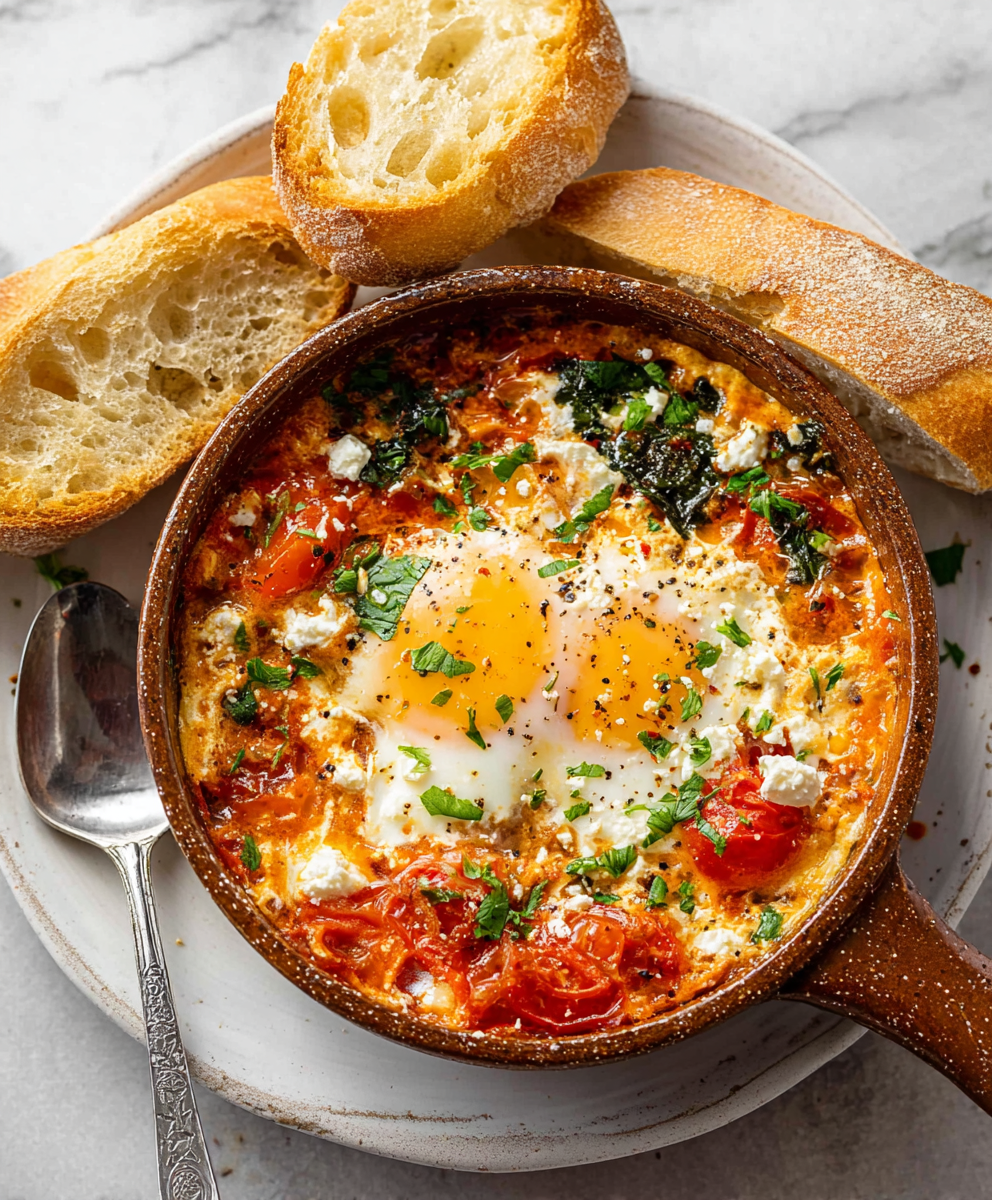
A bright Mediterranean-inspired skillet of blistered tomatoes, roasted feta, tender spinach and baked eggs — perfect for breakfast, brunch or a light dinner.

A bright, creamy frozen treat that tastes like key lime pie — made with Greek yogurt, zesty lime, crunchy gluten-free graham crumbs and toasted coconut for a refreshing, protein-packed snack.
Leave a comment & rating below or tag @magicmealideas on social media!
Enjoyed this recipe? Share it with friends and family, and don't forget to leave a review!
This recipe looks amazing! Can't wait to try it.
Comments are stored locally in your browser. Server comments are displayed alongside your local comments.

Join to receive our email series which contains a round-up of some of our quick and easy family favorite recipes.
