>>
30-MINUTE MEALS! Get the email series now →


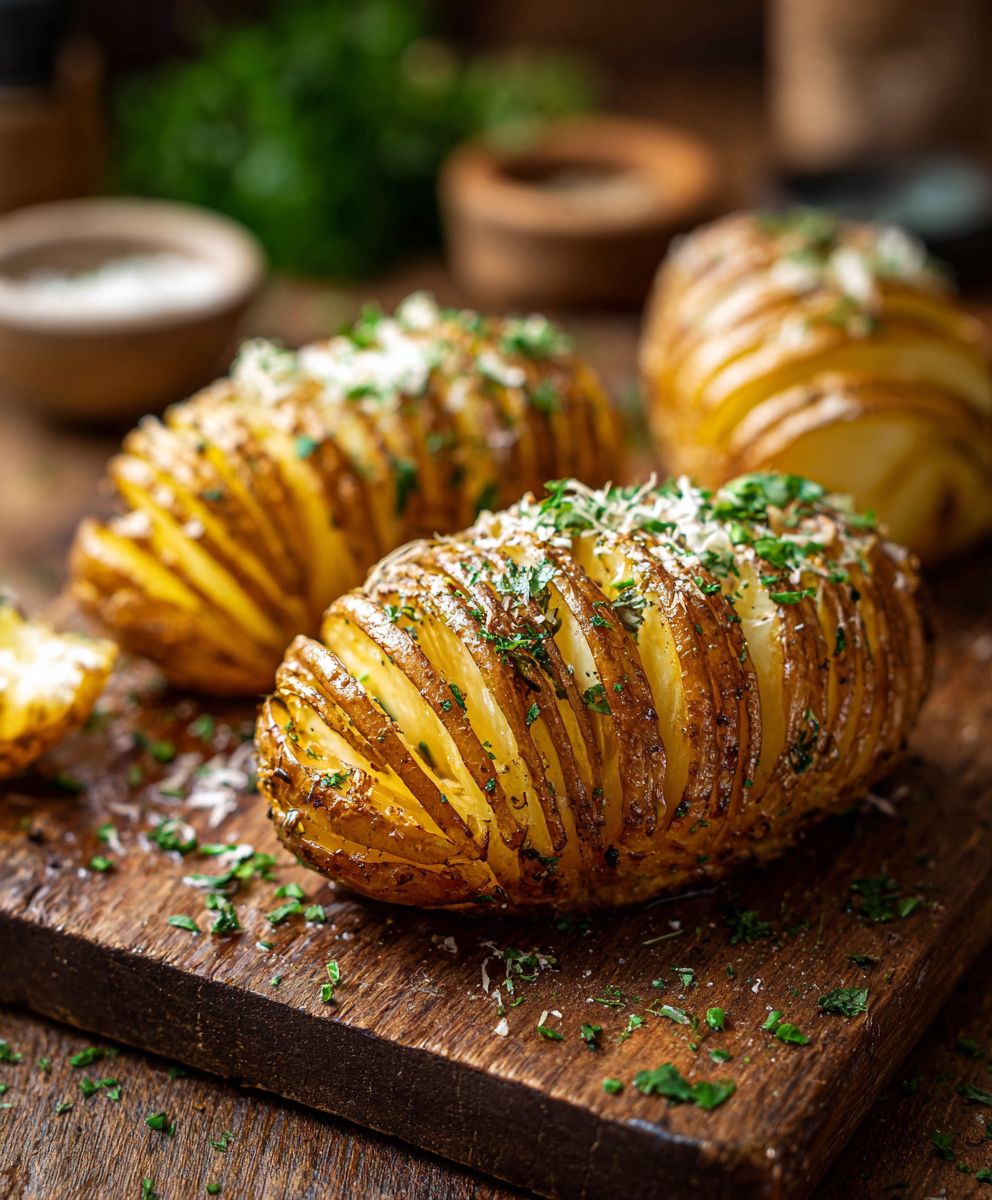
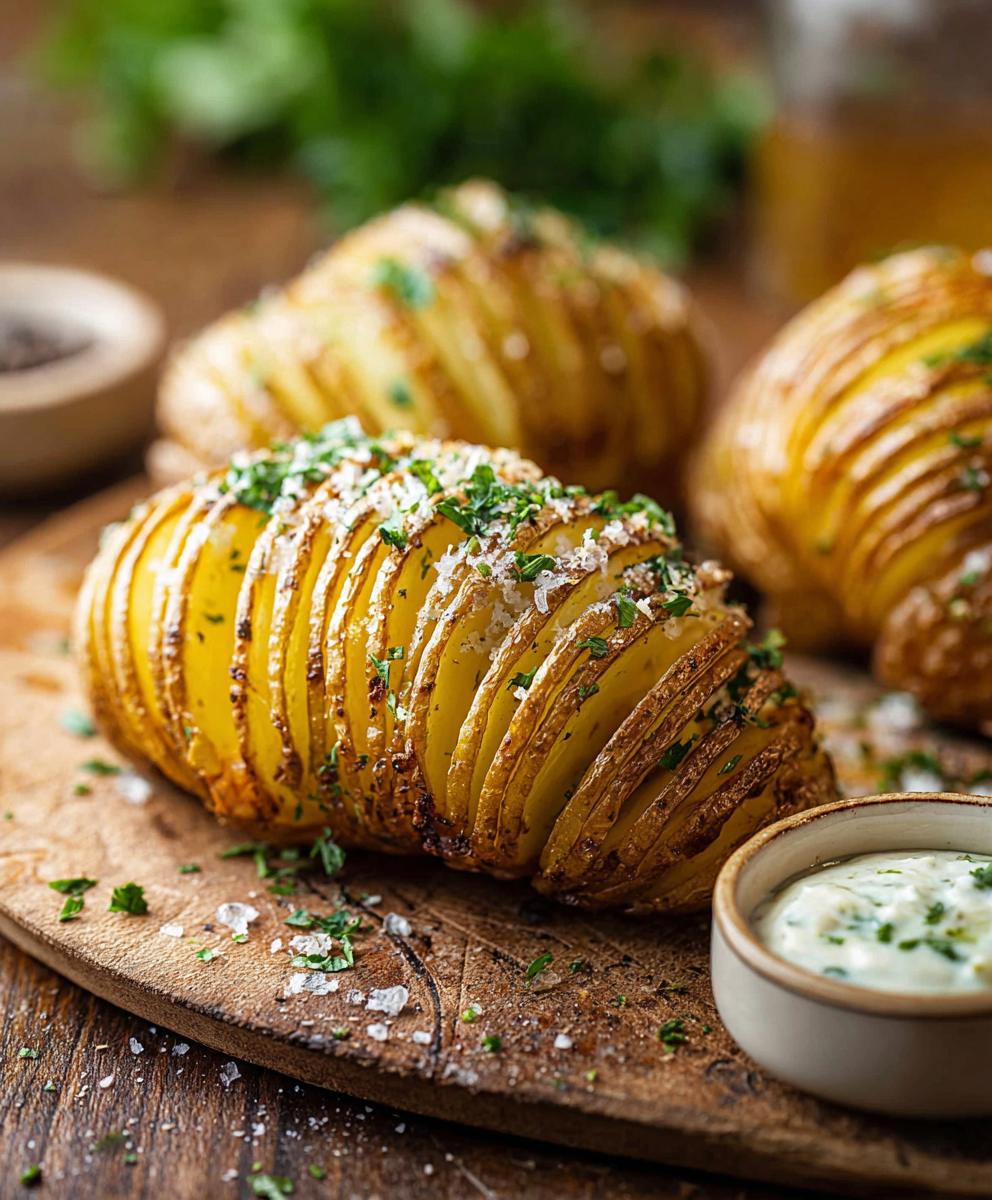
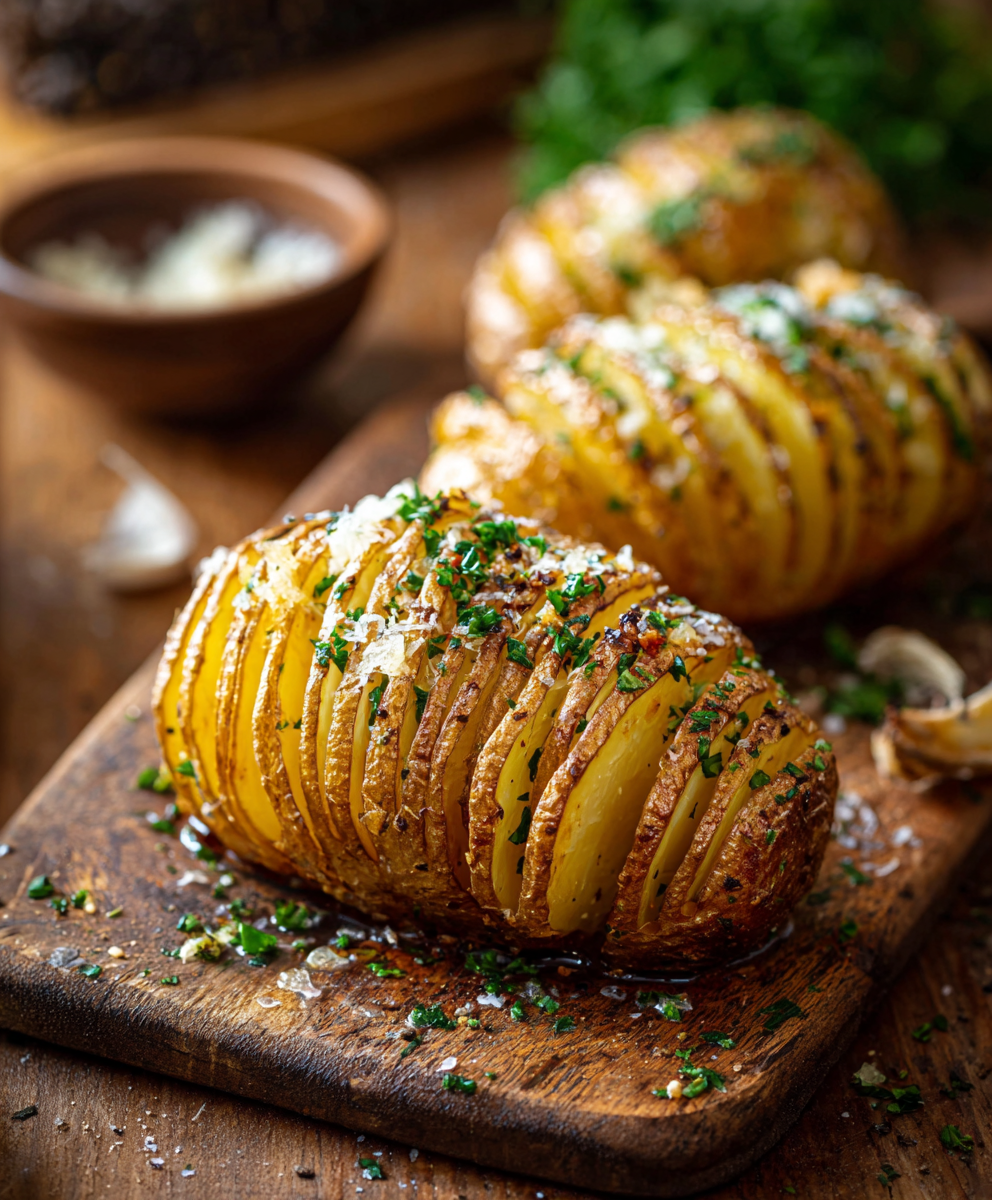
Thinly sliced, butter-brushed russet potatoes baked until the edges crisp and the insides stay tender — a simple side that feels special.

I remember serving these at a small holiday dinner and watching everyone pick them up like little handheld pies — messy, buttery, and completely irresistible. The method has saved me when I wanted something attractive but not fussy, and I always keep the technique in my back pocket for when guests arrive unexpectedly.
My favorite part is the texture contrast: every family meal where I served these turned into a small celebration because the potatoes feel special without requiring fancy ingredients. One year I made them for a casual outdoor dinner and everyone took turns guessing how they were made — that’s the kind of fun, communicative food I aim for when cooking for friends.
Cool leftover potatoes completely before refrigerating to prevent steaming and sogginess. Keep them in a shallow airtight container in a single layer when possible; stacking will compress the edges. Refrigerate up to 4 days. To re-crisp, place on a rimmed baking sheet and bake at 400°F for 10–15 minutes. For freezing, cool fully, flash-freeze on a tray until solid, then transfer to a freezer-safe bag for up to 3 months. Reheat from frozen in the oven at 425°F for 20–25 minutes, checking frequently to avoid burning the exposed edges.
If you don’t have russets, use Yukon Gold for a creamier interior; they won’t crisp quite as much because of lower starch content, but they have excellent flavor. Replace butter with olive oil or vegan butter to make a dairy-free version — use slightly more oil (about 1 tablespoon extra) because it doesn’t cling the same way butter does. For a lower-sodium option, omit the initial kosher salt and add only a small pinch of finishing salt to taste.
Serve with roasted meats, grilled fish, or as part of a vegetarian spread. Garnish with chopped chives, parsley, or a sprinkle of grated Parmesan for a salty, savory finish. For a brunch twist, top with a poached egg and a drizzle of hollandaise. They work beautifully on holiday tables alongside roasted vegetables and a leafy green salad to balance the richness.
The technique originated in Sweden, named after the Hasselbacken restaurant in Stockholm where it was popularized in the 1950s. It’s a mid-century creation that combines simplicity with visual flair — a hallmark of Scandinavian home cooking where modest ingredients are transformed through technique. Over time, cooks around the world have adapted it with regional toppings and seasonings.
In winter, finish with melted butter and thyme or rosemary for a cozy flavor profile. Spring and summer call for lighter toppings: a squeeze of lemon, minced fresh herbs, or a dollop of yogurt with spring onions. For holidays, layer thin slices of garlic or brush with a garlic-herb compound butter before the final bake for an aromatic, celebratory side.
To prep for the week, slice potatoes and store them submerged in cold water to prevent browning for up to 24 hours; pat fully dry before proceeding. Par-bake for 20–25 minutes, cool, and refrigerate; when ready to serve, brush with butter and finish in the oven for 15–20 minutes to crisp. Use rigid containers or trays to avoid squashing the fans.
These potatoes are a reminder that simple techniques can elevate everyday ingredients. Whether you make them for a quiet weeknight or a special occasion, they add warmth and texture to the table — and once you master the cut, it becomes one of those dependable, joyful methods you reach for time and again.
Use a very sharp knife to get clean, even slits; a dull blade will tear the potato and collapse the slices.
Place chopsticks or wooden skewers beside the potato to act as a guide so you won’t cut through the base.
Brush with butter twice — once before the first bake and again after fanning the slices — to get deep color without burning.
This nourishing classic hasselback potatoes recipe is sure to be a staple in your kitchen. Enjoy every moist, high protein slice — it is perfect for breakfast or as a wholesome snack any time.
This Classic Hasselback Potatoes recipe makes perfectly juicy, tender, and flavorful steak every time! Serve with potatoes and a side salad for an unforgettable dinner in under 30 minutes.
Arrange an oven rack in the middle position and preheat to 425°F. Use an unlined rimmed baking sheet so the potatoes can crisp directly on metal. Set aside the melted butter, basting brush, and chopsticks.
Place a potato between two chopsticks or wooden skewers and slice vertically about 1/8 inch apart, stopping when the blade hits the sticks so the base remains intact. Repeat for all potatoes for even cooking.
Place potatoes on the baking sheet. Brush about half of the melted butter over each potato, including between the slits. Sprinkle with 1 teaspoon kosher salt and 1/2 teaspoon ground pepper evenly over all potatoes.
Bake the potatoes for 30 minutes at 425°F until beginning to brown and the interiors are softening. This step partially cooks the centers while allowing the exterior to start crisping.
Remove from the oven, gently fan the slices apart with a knife or tongs to expose more surface area, brush with the remaining melted butter, then return to the oven and bake 30–35 minutes until edges are deeply golden and centers are tender.
Finish with flaky salt and additional pepper to taste. Serve immediately for best texture; add optional toppings like fresh herbs, grated cheese, or a dollop of sour cream as desired.
Last Step: Please leave a rating and comment letting us know how you liked this recipe! This helps our business to thrive and continue providing free, high-quality recipes for you.
Leave a comment & rating below or tag
@magicmealideas on social media!
Thinly sliced, butter-brushed russet potatoes baked until the edges crisp and the insides stay tender — a simple side that feels special.

A bright Mediterranean-inspired skillet of blistered tomatoes, roasted feta, tender spinach and baked eggs — perfect for breakfast, brunch or a light dinner.

A bright, creamy frozen treat that tastes like key lime pie — made with Greek yogurt, zesty lime, crunchy gluten-free graham crumbs and toasted coconut for a refreshing, protein-packed snack.
Leave a comment & rating below or tag @magicmealideas on social media!
Enjoyed this recipe? Share it with friends and family, and don't forget to leave a review!
This recipe looks amazing! Can't wait to try it.
Comments are stored locally in your browser. Server comments are displayed alongside your local comments.

Join to receive our email series which contains a round-up of some of our quick and easy family favorite recipes.
