
No-Bake Biscoff Layered Delight

A luscious, no-bake layered dessert featuring crunchy Biscoff crust, silky Biscoff cream, and a velvety whipped topping. Easy to assemble and perfect for parties.
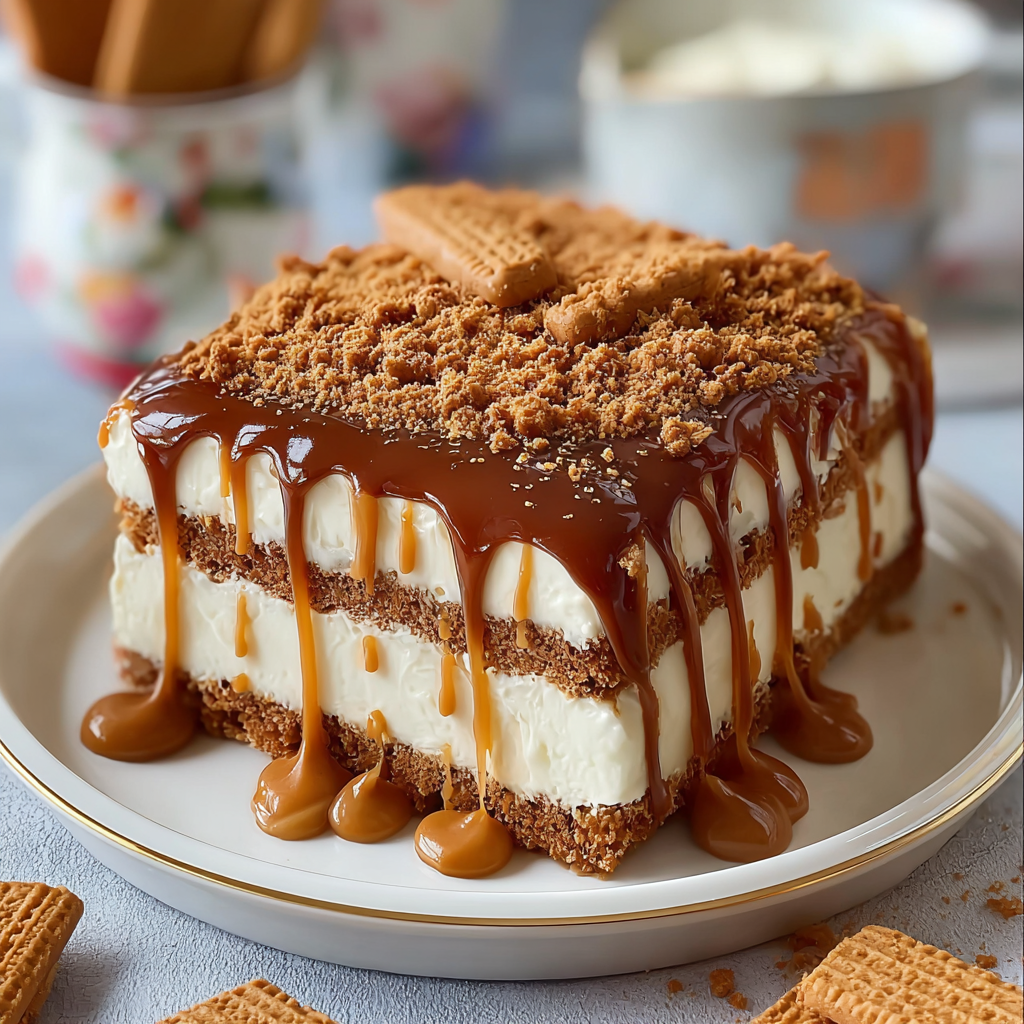
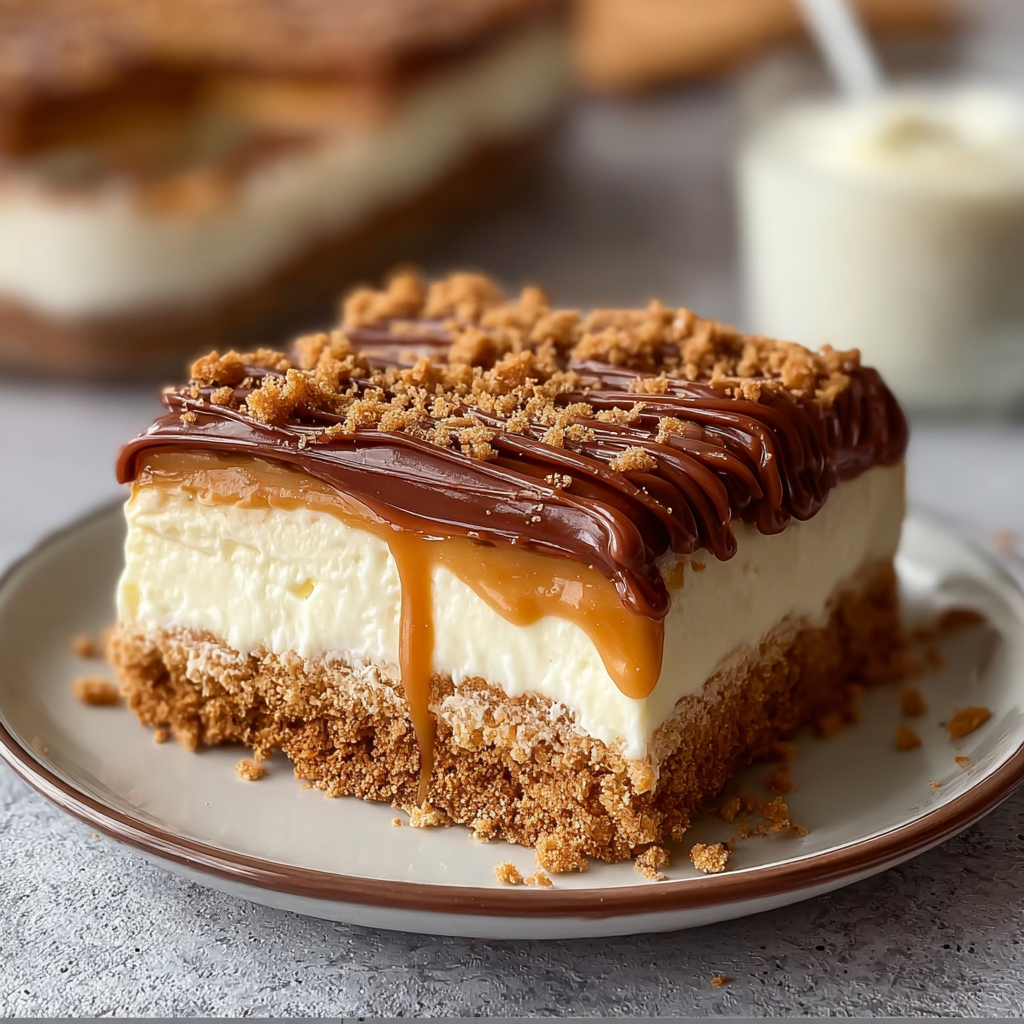
This creamy, no bake Biscoff layered delight became my secret weapon at potlucks and family gatherings the moment I discovered it. I first assembled this version on a rainy afternoon when I wanted something indulgent yet simple. The result was a crunchy spiced cookie base, a luxuriously smooth filling enriched with Biscoff spread, and a light cloud of whipped cream on top. It is both familiar and a little unexpected, a dessert that prompts immediate smiles and second helpings.
I love how the texture shifts from crisp to silky with every forkful. The cookie crust holds its crunch even after refrigeration if you follow the chilling steps. The flavors are built on warm caramel and cinnamon notes from the cookie crumbs and Biscoff spread, balanced by the freshness of whipped cream and a bright hint of vanilla. Serving this dessert has become a small ritual for us; guests always ask how quickly it came together and whether they can take the recipe home.
Why You'll Love This Recipe
- This dessert comes together quickly with no oven time, making it ideal for hot weather or last minute entertaining.
- It uses pantry staples and jarred Biscoff spread for an elevated flavor without hard to find ingredients.
- Prep is straightforward and family friendly, so kids can help with crushing cookies and layering.
- You can make it ahead and refrigerate overnight, which improves texture and frees you on the day of serving.
- It is immensely versatile, allowing gluten free swaps or a dairy free alternative with simple substitutions.
- Ready in about 20 minutes active time and a few hours chilling, perfect for easy entertaining.
In my house this recipe became a weekend favorite almost instantly. My partner raves about the caramel spice and my niece insists on an extra sprinkle of crushed cookies on top. I learned that letting the base set for at least one hour makes slicing much cleaner. The balance between crunchy crumbs and smooth filling is the real reason people come back for more.
Ingredients
- Biscoff cookies: Use 13 ounces total, crushed to fine crumbs, for a sturdy spiced crust. I like Lotus Biscoff brand for its caramel cinnamon profile and consistent texture.
- Unsalted butter: 6 tablespoons melted, to bind the cookie crumbs. Room temperature butter will not bind as evenly, so melt and cool slightly before mixing.
- Biscoff spread: 1 cup smooth spread, this supplies the signature flavor. Choose classic crunchy only if you want extra texture in the filling.
- Cream cheese: 8 ounces at room temperature, for body and tang in the filling. Full fat gives the best mouthfeel but a light version will work with slightly firmer set.
- Powdered sugar: 3⁄4 cup, to sweeten and stabilize the cream cheese layer without grittiness.
- Heavy cream: 1 1⁄2 cups cold, divided. Two thirds goes into whipped topping and the rest lightens the Biscoff cream. Cold cream whips faster and yields more volume.
- Vanilla extract: 1 teaspoon to round flavors. Use pure vanilla if possible for depth.
- Sea salt: 1⁄8 teaspoon to brighten the sweetness. Optical pinch, but it makes a real difference.
Instructions
Prepare the crustPlace 13 ounces of Biscoff cookies in a large sealable bag and crush to fine crumbs using a rolling pin or pulse in a food processor. Add 6 tablespoons melted unsalted butter and mix until the crumbs hold together when pressed. Press the mixture firmly into the base of a 9x9 inch pan lined with parchment, creating an even layer about 1⁄2 inch thick. Chill for 20 to 30 minutes so the crust firms up and will not become soggy under the filling.Make the Biscoff creamIn a large bowl beat 8 ounces room temperature cream cheese until very smooth. Add 1 cup Biscoff spread and 3⁄4 cup powdered sugar and beat on medium until fully incorporated and silky, about 2 to 3 minutes. Scrape down the sides to avoid lumps. If the mixture seems too stiff, fold in 2 tablespoons of cold heavy cream to loosen it slightly without making it runny.Whip the creamChill a medium mixing bowl and whisk attachment if possible. Pour 1 cup cold heavy cream and 1 teaspoon vanilla extract into the bowl and whip on medium high until soft peaks form. Be careful not to overbeat to avoid a grainy texture. Reserve about 1⁄4 cup of whipped cream for a lighter top layer if you want distinct layers.Assemble the layersGently fold two thirds of the whipped cream into the Biscoff cream using a rubber spatula. Folding keeps the filling light and airy. Spread the blended filling evenly over the chilled crust. Smooth the top with an offset spatula and refrigerate for at least 1 hour to set the center.Add the toppingTop the set Biscoff layer with the remaining whipped cream. For presentation, pipe rosettes along the edge or spread it evenly and sprinkle with 1⁄3 cup crushed Biscoff cookies. For a glossy finish warm 2 tablespoons of Biscoff spread and drizzle thinly over the whipped cream using a spoon.Chill and serveRefrigerate the assembled dessert for at least 2 hours, preferably overnight. This improves texture and deepens flavor. When ready to serve, run a knife under hot water, dry it, and slice cleanly. Store leftovers covered in the refrigerator for up to 3 days.
You Must Know
- The dessert keeps well in the refrigerator up to 3 days and freezes well for up to 2 months if wrapped tightly in plastic and foil.
- It is high in calories and fat so serve smaller slices for large gatherings; a 2 inch square is satisfying for most guests.
- The crust stays crisp if you avoid excess liquid in the filling and allow adequate chilling time before slicing.
- Allergens include wheat, dairy, and soy if using standard Biscoff cookies and cream cheese.
- Switch to gluten free cookies and nondairy cream for dietary needs but expect slightly different texture and set.
My favorite aspect is how easy this recipe makes people feel like they are enjoying something luxurious without the fuss. At a birthday last spring I overheard someone ask whether the filling had been baked, and I smiled because the answer was no. The silkiness of the Biscoff cream contrasts beautifully with the crisp base, and tiny adjustments in chilling time allow you to control firmness. It is the combination of simple technique and big flavor that keeps me returning to this dessert whenever I want an impressive finish with minimal effort.
Storage Tips
Store covered in the refrigerator for up to 3 days to maintain best texture. For longer storage wrap the pan tightly in plastic, then foil, and freeze up to 2 months. Thaw overnight in the refrigerator before serving. When reheating slices to soften slightly, leave at room temperature for 20 minutes or microwave a single slice on low for 8 to 10 seconds to avoid melting the whipped topping. Use airtight containers to prevent flavor transfer from other foods.
Ingredient Substitutions
For a dairy free version replace cream cheese with 8 ounces of firm tofu or dairy free cream cheese, and use coconut cream whipped with a stabilizer. Swap regular Biscoff cookies for gluten free spiced biscuits in the same weight to keep the crust structure. To reduce sweetness, cut powdered sugar to 1⁄2 cup and taste the filling before adding more. If Biscoff spread is unavailable, combine smooth peanut butter with a teaspoon of cinnamon and two teaspoons of brown sugar as a last resort.
Serving Suggestions
Serve chilled in squares on a decorative platter with a small side of fresh berries to cut the richness. A sprinkle of flaked sea salt on top enhances the caramel notes. For formal presentations pipe the whipped cream into rosettes and add a whole Biscoff cookie on the edge of each slice. Pair with strong coffee or black tea to balance sweetness and provide a classic cafe style experience.
Cultural Background
Biscoff biscuits originated in Belgium and are beloved for their caramelized, spiced profile. The spread grew in popularity globally and inspired layered desserts that emphasize contrast between crunchy spiced biscuits and smooth fillings. This dessert is a modern adaptation of classic layered sweets that use cookie crusts and creamy fillings. It brings together Northern European spiced biscuit tradition and the no bake, convenience forward approach popular in American home cooking.
Seasonal Adaptations
In winter add a pinch of ground ginger and cardamom to the crumbs to echo holiday spice. For summer lighten the filling with an additional 1⁄4 cup whipped cream and top with raspberries. For fall consider folding 1⁄4 cup pumpkin puree and 1 teaspoon pumpkin pie spice into the Biscoff cream, reducing added sugar slightly to account for pumpkin sweetness.
Meal Prep Tips
Make the crust and filling a day ahead, then store them separately until the day of assembly for the freshest whipped topping. Portion into individual jars or cups for grab and go desserts. Use a piping bag to speed up waxing paper lined pans and consider cooling the pan on a wire rack before slicing to prevent sticking. Label containers with date and contents when freezing to ensure rotation.
This dessert invites creativity and sharing. Whether you are serving family after a long week or presenting at a gathering, the layered contrast and simple assembly make it a favorite that is easy to personalize and enjoy.
Pro Tips
Chill the mixing bowl and beaters for faster whipping and more stable peaks.
Warm your knife under hot water and dry it before slicing for clean edges.
Allow the crust to firm in the freezer for 15 minutes if you are short on time.
Taste and adjust sweetness before folding in the whipped cream to avoid over sweetening.
This nourishing no-bake biscoff layered delight recipe is sure to be a staple in your kitchen. Enjoy every moist, high protein slice — it is perfect for breakfast or as a wholesome snack any time.
FAQs about Recipes
How long should I chill the dessert before serving?
Chill at least 2 hours, ideally overnight, so layers set and slicing is clean.
Can I make this gluten free?
Yes substitute gluten free spiced cookies and confirm the Biscoff style spread is gluten free.
Tags
No-Bake Biscoff Layered Delight
This No-Bake Biscoff Layered Delight recipe makes perfectly juicy, tender, and flavorful steak every time! Serve with potatoes and a side salad for an unforgettable dinner in under 30 minutes.
Ingredients
Crust
Filling
Topping
Instructions
Crush cookies and make crust
Crush 13 ounces of cookies until fine. Mix with 6 tablespoons melted butter. Press into a lined 9x9 inch pan and chill 20 to 30 minutes to set.
Prepare Biscoff cream
Beat 8 ounces room temperature cream cheese until smooth. Add 1 cup Biscoff spread and 3/4 cup powdered sugar and beat until silky. Adjust with 2 tablespoons cold cream if too stiff.
Whip the cream
Chill bowl and whisk. Whip 1 cup cold heavy cream with 1 teaspoon vanilla until soft peaks form. Reserve a small portion for decoration if desired.
Fold and assemble
Fold two thirds of whipped cream into the Biscoff cream gently. Spread over chilled crust and smooth the surface. Refrigerate at least 1 hour.
Top and garnish
Spread remaining whipped cream on top. Sprinkle with 1/3 cup crushed cookies and drizzle 2 tablespoons warmed Biscoff spread if desired.
Chill before serving
Chill the assembled dessert for at least 2 hours or overnight. Slice with a hot knife for clean pieces and store leftovers covered in the refrigerator up to 3 days.
Last Step: Please leave a rating and comment letting us know how you liked this recipe! This helps our business to thrive and continue providing free, high-quality recipes for you.
Nutrition
Did You Make This?
Leave a comment & rating below or tag
@magicmealideas on social media!
Categories:
You might also like...

Classic Hasselback Potatoes
Thinly sliced, butter-brushed russet potatoes baked until the edges crisp and the insides stay tender — a simple side that feels special.
Baked Feta Eggs
A bright Mediterranean-inspired skillet of blistered tomatoes, roasted feta, tender spinach and baked eggs — perfect for breakfast, brunch or a light dinner.
Key Lime Pie Yogurt Bark
A bright, creamy frozen treat that tastes like key lime pie — made with Greek yogurt, zesty lime, crunchy gluten-free graham crumbs and toasted coconut for a refreshing, protein-packed snack.
Did You Make This?
Leave a comment & rating below or tag @magicmealideas on social media!
Rate This Recipe
Share This Recipe
Enjoyed this recipe? Share it with friends and family, and don't forget to leave a review!
Comments (1)
This recipe looks amazing! Can't wait to try it.
Comments are stored locally in your browser. Server comments are displayed alongside your local comments.

Hi, I'm Chef!
What's Popular

30-Minute Meals!
Join to receive our email series which contains a round-up of some of our quick and easy family favorite recipes.